
instagram youtube facebook bloglovin
Powered by Blogger.
  • Home
  • Topics
    • Beauty
    • Chit Chat
    • Epica
    • Fashion
    • Favorites
    • Taste
    • Travel
    • Skincare
    • Musing
  • Media
  • Events
  • About
  • Contact
  • Impressum

SMOONSTYLE


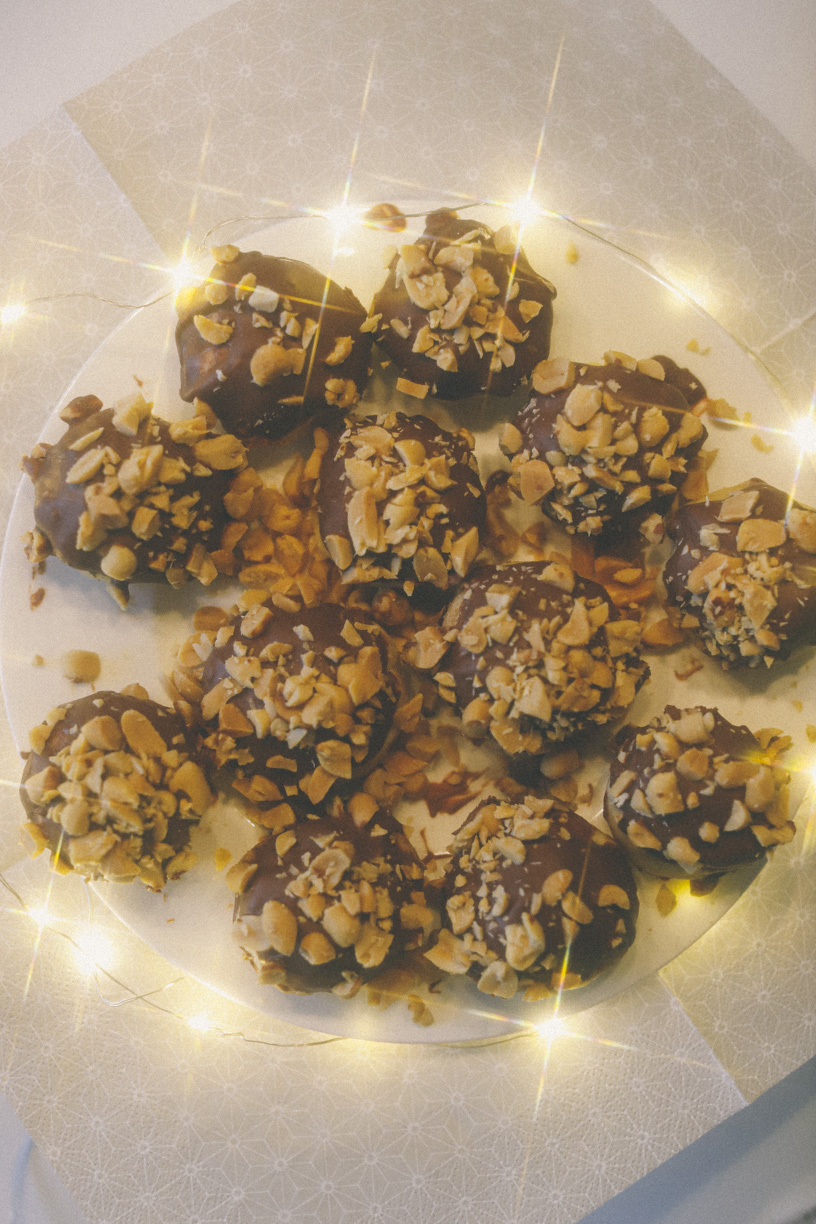
These Christmas cookies were a huge hit with my boys! They are from Emmas Goodies. You can find the link here: YouTube 

All I did differently was that I've added some extra salted peanuts on top of the chocolate. Like this they tasted even more like Snickers :) Snowball Snicker Cookies. 

These are already the second batch that I made. They turned out more photogenic than the first batch haha! They are not really a sight for soar eyes, but they are delicious! You do need a little patience when you make these. After you've made the dough and shaped them into little balls, you have to place the freezer for 2 hours! 

Best start early in the morning, so you can enjoy them during tea/coffee time in the afternoon :)

Did you guys bake any holiday cookies this season?

I want to wish you happy holiday and a easy transition into the new year! 2022 sounds like a good year to me!


xo

Simone


25.12.21 No comments


Yesterday was Advent Sunday. That is when a lot of parents spend the day in the kitchen with their kids, making Christmas Cookies. Vincent loves to decorate cookies, but what he loves more is to eat the decoration. The cookies you see in the photos are the ones that I decorated. My little Gingerbread man broke so we ate his head and foot while we were working on the other cookies.

The recipe that I used is a generic sugar cookie recipe, but with cacao powder.

270 g Flour
50 g Baking cacao
120 g powdered sugar
pinch of salt
150 g cold butter
2 eggs

First, you mix the dry ingredients and then the eggs and butter. Mix fast so that the butter doesn't melt that much. Refrigerate for at least 40 minutes.

Depending on the size of the cookie you can bake them between 7-10 minutes at 180 degrees Celsius.
The smaller cookies I backed for 7 minutes and the big for 10 ;)

I love to use all the colorful sprinkles and confetti. The metallic powder that I used for Vincent's spider cake, we also used to paint some of the cookies with.

We had so much fun! I am looking forward to the next cookie baking session with Vincent.

What are your favorite cookie recipes? Please share recipes in the comments!


30.11.20 No comments


Vincent wanted a Spiderman Cake for his 7th birthday. Challenge accepted! 
I had no experience how to create a Spiderman cake, so I turned to Youtube and watched several tutorials of how other people managed to create an awesome Spiderman cake.

I had many different ideas in my head how to do it, but the final result depended on the ingredients and tools that I was able to get my hands on. 

The one thing that I never tried before, was working with fondant. I always tried to stay far away from making cakes that required the fondant as an ingredient. I am more a messy baker.
I binge watched all the tutorials that I could find online so that I would make as minimal mistakes as possible. 

I ordered some red fondant online and went to the biggest supermarket to make sure that I would get all the ingredients needed for the cake and the decoration. I bought some more red and black fondant, in case my package wouldn't arrive on time. The package arrived on time, but the red fondant was more pink than red. In case my attempt would be a total flop, I also bought a cake topper with Spiderman design. It is always good to have a backup plan. 

To make things extra challenging, my dishwasher decided to have an electrical breakdown. Worst timing ever! Of all the things that I don't like when it comes to household chores,  doing the dishes has to be on the top of that list. 


The Cake


The recipe that I used to make the chocolate cake is from Sallys Welt. Vincent loves chocolate cake, I think most men do. It was super easy and absolutely foolproof. It is a more dense cake compared to what I normally make, but this is perfect for fondant topping.

I cut off the domed shape of the top of the cake to make it nice and even and set the parts that I cut off aside. I was going to use that part of the cake to make cake pops for the children's birthday party. Cake pops are always a great treat for kids. 

Sealing off the cake with two layers of dark and milk chocolate ganache. 
Sally has a great converter on her website: Ganache Recipe The ratio between heavy cream and chocolate differs depending on which kind of chocolate you have and how you want to use the ganache. You can use it for topping, but also as a filling layer in between the cake. That was a bit too tricky for me. Besides, I had run out of chocolate so I just went for the ganache topping.

Unfortunately, I didn't have enough red fondant to cover the whole cake, so I took the black fondant to create a belt around the cake, problem solved!
Rolling fondant and making sure it doesn't stick to the countertop was a bit tricky. The fondant roller worked really well, but I didn't have the right baking powder/sugar mixture to spread on the countertop to roll out the fondant. I used icing sugar, but that made the fondant a bit sticky. 

Going through my baking supplies, I found this metallic cake/cookie dust that I purchased a while ago. For a second I doubted if I should use it, but decided to go for it. The end result was lovely! It felt a bit like applying makeup to the cake haha!

Now it was time to create the spider webs on top of the cake. You need a steady hand for this and also steady pressure on the tube. I purchased black glitter sugar tubes (sorry, I don't know the name in English) that you use to decorate cookies and cakes with. I bought a pack of 4 colors, gold, white, black and red. The other colors will be put to good use around Christmas time when we will be backing cookies all the time ;)

With a kind of steady hand, I managed to make a decent looking spiderweb. 
I decided to also put eyes on the cake, and I totally mismeasured and misplaced them haha! At first, they were too small, then I made a second pair that was bigger and put them on top of the smaller ones.
I placed them too close to each other, creating a rather crossed eye Spiderman haha! The red glitter sugar tube helped me fix the outlines of the eyes a bit.


Vincent loved the cake and that is all that matters. It was the first thing he said when he came walking down the stairs: 'Cool cake mom', he said!


5.10.20 No comments


Time to spice up your life with a new give away! SPICEBAR has kindly offered to send out two sets of their new delicious toppings. I have been devouring the Topping allrounder. I love to put it on top of my sandwiches, eggs and salads. It is so versatile!

All you need to do is tell me in the comments what your favourite meal of the day is and which spices you usually use. Are you a breakfast, lunch or dinner person? 

My discount code, Simone Simons is still valid and will give you €5 discount from the amount of €15.

Giveaway is open for Germany and Austria. The 2 winners will be announced on the 29th of September.

Good luck and eet smakelijk!

22.9.20 No comments


Have you guys been spending more time in the kitchen lately like me?
Quarantine time has got me backing, cooking and eating more than ever before. I have enjoyed going to restaurants and bars in the past, but I have to be my own chef nowadays. Still hate to clean the kitchen, that hasn't changed ;)

A spice mix that I have been loving for so long is from the brand SPICEBAR. They are a german company that offers high quality organic spices and dried herbs. In my household we love Italian food and the 'Pizza & Pastazauberei' is a staple in my kitchen. I have posted an easy SUMMER PASTA recipe on the blog where I used these dried herbs. When I make grilled cheese sandwiches, I like to add this as well. There are so many ways how you can use this. I wholeheartedly recommend it to all food lovers out there.

There is a wide array of products that you can choose from. The 'Red Thai Curry' went into my sweet potato soup, and it was so good! The 'Rührei Deluxe' (Scrambled Eggs) always tops off my omelet and newly the 'Vanille Hafertraum' goes on top of my muesli, the Cinnamon on my waffles, I can go on for a while. If you guys want me to show you how to make your own granola, I can make a little video as well. Let me know in the comments ;)

SPICEBAR has created the discount code 'simonesimons' that will give you €5 of any order from €15.

https://www.spicebar.de

Happy cooking, baking and eating! Make sure that you don't have to do the cleaning afterwards ;)


20.5.20 No comments


If you are a fan of pasta and garlic, you are going to love this!
This summer pasta is super easy to make. This is a fool proof recipe, I promise!
It is a mixture between a caprese salad and bruschetta, but then with pasta.

What you need is your favourite pasta. I like to take tagliatelle for this, but you can use any pasta you like. Depending on the amount of mouths you have to feed (mine are three), you can up the ingredients.


500 grams cherry tomato
250 grams mini mozzerella balls
two hands of fresh basil
4 cloves of garlic
lot of good quality olive oil (very important)
Italian dried herbs (I use Spicebar Pizza and Pasta mix)
Salt and black pepper
The pasta of your choice


* Wash the cherry tomatoes and cut them in half. Put them in a bowl. Preferably one that is big  enough for the cooked pasta to fit in in the end. Like this you get all the flavours. Yummy!

* Be very generous with the olive oil.

* Press the garlic cloves and add to the tomatoes. 

* Wash the basil leaves and cut them in medium chunks. Add to the sauce.

* Finish off with some salt and pepper and the dried Italian herbs. 

* Wrap with cling film and let it marinate for 30 min to one hour. 


When you are ready to have dinner, cook your choice of pasta.
Once the pasta is finished, rinse well and add to the sauce. At this point I add the mini mozzarella balls. They become nice and soft. A little warning, you might smell very strongly of garlic. You have to make sure the whole family eats it haha! Vincent doesn't like uncooked tomatoes nor mozzerella balls. He just eats the pasta and then I add some tomato sauce to it.


Enjoy! 


12.4.20 No comments

Banana Bread for us is not a quarantine food, but something we enjoy all year around. It is the perfect way to use those over ripe bananas that are not looking to tasty anymore. You can also use them in a smoothie or chop them up and freeze them. Great to make nice cream as well. Today they are going to be used for Banana Bread. Yummy!

The first banana bread recipe that I posted on my blog is over 6 years ago. I have tried different versions of this classic and I must say that I found the perfect recipe that I altered a bit to my liking and also to what I have in my pantry. These days you have to freestyle a bit, because flour is hard to come by.
If you can't find whole wheat flour, you can also process oats in a blender. Works well and is super healthy and delicious.

The recipe that I used is from Cookie and Kate. I just love eating banana bread for breakfast. To completely honest to you, it is actually like a breakfast starter or a first breakfast. We are a family of Hobbits and love to have a second breakfast.

The only things that I changed were the amount of honey (Vincent and I don't like honey) and I added a quarter cup of yoghurt. Things that I have been enjoying lately is filming baking videos on Instagram.
I grabbed my tripod and camera and filmed this recipe for you:

Bananananana Bread


What is your favourite Banana Bread recipe?


9.4.20 No comments


Open up, I am going to feed you some delicious food for breakfast! 


Raiza and me met up yesterday at a lovely Italian pasta restaurant called MISI in Brooklyn. MISI is the 'sister' restaurant from LILIA. Apparently Lilia is booked for a long time in advance, after Barack Obama recommended the restaurant. MISI is a little bit more underground, but the food is just as scrumptious!

Luckily, my sinus infection has gotten much better, so my palette almost back and I can finally taste again! Hallelujah!! That is one of the worst things about being sick for food lovers like myself.

Raiza knew what to get from the menu from previous experience, so I fully trusted her to choose for me. We ordered two starters, along with two Aperol Spritz'. Gotta have that Aperol Spritz ;)


Starters

Charred peppers, marjoran with whipped ricotta crustini
Delicata squash, honey, rosemary, smoked ricotta garlic bread crumbs

Main Course

Spinach and mascarpone filled tortelli, brown butter, ricotta salata
Sheep's milk ricotta filled occhi, bottarga, lemon

Dessert

Mint stracciatella ice cream with coffee


Everything is made from scratch. I could see one of the staff members preparing the pasta. I was mesmerised. Pasta is one of the few dishes where I never trusted myself to make it myself. Maybe I should give it a go?

Thank you Raiza for a lovely dinner for breakfast with mouth-watering dishes!
I can wholeheartedly recommend Misi. It is a bit on the pricey side, but well worth it!

Misi New York

Raiza has one of the most contagious smiles in the world!

Delicata Squash


Spinach Mascarpone Tortelli


Sheep's milk Ricotta filled Occhi with lemon. Aren't these super cute?!


If you are in Brooklyn and you are a pasta lover, you will not regret paying a visit to MISI.
13.1.20 No comments


Who doesn't love donuts? For me the best donuts I've ever had were from Voodoo Donuts. Just the plain one with powdered sugar. It is pure heaven!

Vincent is a big donut fan. For his 6th birthday I made mini donuts with a donut maker. They were the treats he took with him to his classroom to hand out to his classmates. He was already telling the kids the day before his birthday that he was going to bring donuts.

I decorated them with some white chocolate and a couple of sprinkles. These donuts are not fried, but baked. They taste more like like sponge cake, then donuts. The kids loved them anyway and they are a little less unhealthy ;)

The recipe that I used is the one that is in the manual from the donut maker. I am sure that there are better recipes out there. I will definitely experiment more. Next recipe I will try will be with yeast. I saw that Laura in the Kitchen has some recipes. The ingredients should be a little different because these donuts are baked and not fried.

Here is a link to the one that I got from KIK:  Donut Maker


Recipe from the Manual

260g plain flour
130g white sugar (I use half)
1 packet vanilla sugar (8g)
250 ml milk
3 eggs
5 table spoons oil
1 bag baking powder (16g)
sprinkle of salt
your topping of choice


1. Add all ingredients in a bowl and mix until nice and smooth.
2. Heat up the donut maker (I've heated it a couple of times before I used it. You should always do this when using new appliances).
3. Butter or oil up the machine.
4. Add the batter with a table spoon on the lower part of the donut shape. One table spoon should be enough. The batter will rise up to the upper part of the donut.      
5. Bake them for about 3 to 4 minutes.
6. Take out the donuts and let them cool down before you decorate them.


They were a total hit with 6- year- olds and my parents loved them too ;) I like that they were bite size.


Enjoy!


15.10.19 No comments

Vincent's 4th birthday was already 4 months ago, but I thought I'd still share with you the delicious treats that I made.

We decided that the theme of the party would be 'Pirates'. All boys of his age love anything pirate-related. I went online to buy anything pirate-related. Stickers, table cloth, puzzles, wrist bands, etc. Balloons with confetti, I thought they were a good idea. Well, let me tell you that I still find those pesky little confetti pieces whenever I hoover through the house.

Now on to the baking. I turned to Pinterest. You can find so many cute ideas on there. Whenever I don't know what to do, Pinterest always comes to the rescue.

The Smarty Fish Cake

• Ingredients for your favourite pound cake
• Two bags of the bigger smarty tins
• Dark chocolate (or that of your preference)
• Decoration eyes

You can take whichever vanilla or even chocolate cake recipe you like. I used a buttermilk pound cake recipe from Cooking with April. Bake it in a round baking tin. I baked the remaining batter in a rectangle baking tin and used that as a stand for the Cookie Pirates.

When it has cooled down completely, you cut out a small triangle and place it as a fish tale. It is so simple, but so genius! Coat it with molten chocolate of your choice and decorate with smarties. Done!

The Cookie Pirates

• 6-8 Oreo cookies
• Cake pop sticks
• White chocolate
• Decoration sprinkles
• Decoration eyes

For the cookie pirates I took plain old Oreos. Gently open up the Oreo cake and dip the sticks in molten white chocolate. Close the cookies again and wait for the chocolate to harden. Coat them completely with white chocolate and decorate to your liking. I placed them in the fridge to cool down even more.

Vincent couldn't wait to eat a cookie pirate. The fish remained kind of untouched and was mainly eaten by Oliver and me. All the kids want to do is play. At the end of the party, I made some poffertjes with home made apple sauce. They devoured it!

Hope you like the baking ideas!


16.3.18 No comments

The baking season has started. Honestly, I always bake. In autumn and winter a bit more than normal. But let's face it. My oven is always working.

One of my favorite YouTubers, Funnypilgrim/Yummypilgrim shared a lovely gingerbread man recipe that I wanted to try. On the hunt for the spices I went. Sold out everywhere. We all got the baking fever and so it took me a while to get the spices. In my spice drawer I found some old 'Lebkuchen Gewürz' and decided to take the chance.

For this lovely Gingerbread cake and cake pops you will need:

THE CAKE
  • 220g flour
  • 100g brown sugar
  • 2 tbsp baking soda 
  • 3 tbsp gingerbread spices
  • Dash of salt
  • 50ml oil (I use sunflower oil)
  • 50g apple sauce or one egg in case you are vegan
  • 50g molasses
  • 100ml water or dairy-free milk

THE GLAZE
  • 1 tbsp apricot jam
  • 1 tbsp of water
  • 100g molten dark chocolate (vegan or non-vegan)

DIRECTIONS
Preheat the oven to 180 Celsius.
Mix the dry ingredients and then add the wet ingredients.

Place the batter in the oven for about 30 to 40 minutes and always check with a tooth pick to see if it comes out clean when you pierce it in the middle.

Now we get to the cake pop part. My cake was not very pretty because I couldn't get it out of the baking tin. It looked quite destroyed. I cut off the top, bottom and sides to turn it into a rectangular shape. The left over cake I crumbled and mixed with a little bit of marmelade. Just enough to bind the crumbs together.

Melt the chocolate of your choice, it can be milk, semi sweet or even white chocolate. It's up to you! Since I had milk chocolate on hand, I went for that option.

I decorated the cake and added some chopped almonds, amaretti cookies and cranberries! Delicious! For the cake pops I went a little crazy and used all the fun toppings that I still had at home.

My tip for cake pops would be to first dunk the sticks in the molten chocolate and then push them in the cake balls. Let them cool upside down in the fridge for 10 minutes before you add the chocolate and decorate them.

The video for the cake you can find here: Cake
Mira (funnypilgrim) also has her own cookbook 'Yummy Kitchen' available (in German).

7.12.17 3 comments

If there is one thing my boys love to have for breakfast, it's pancakes.

26.10.17 7 comments
Older Posts

Welcome to SmoonStyle

About Me

Here you will find everything that defines my style, whether it is beauty, fashion, food, or photography. Enjoy!

Follow

LH Cosmetics x Simone Simons

Join Me On Patreon

Visitors

Blog Archive

  • ▼  2025 (2)
    • ▼  April (2)
      • LH Cosmetics Artsticks
      • Dupe Alarm
  • ►  2023 (1)
    • ►  February (1)
  • ►  2022 (10)
    • ►  December (2)
    • ►  September (1)
    • ►  June (1)
    • ►  May (1)
    • ►  April (1)
    • ►  March (1)
    • ►  February (1)
    • ►  January (2)
  • ►  2021 (34)
    • ►  December (3)
    • ►  November (2)
    • ►  September (2)
    • ►  August (3)
    • ►  July (3)
    • ►  June (2)
    • ►  May (2)
    • ►  April (5)
    • ►  March (2)
    • ►  February (8)
    • ►  January (2)
  • ►  2020 (66)
    • ►  December (7)
    • ►  November (5)
    • ►  October (4)
    • ►  September (15)
    • ►  August (4)
    • ►  July (3)
    • ►  June (6)
    • ►  May (5)
    • ►  April (5)
    • ►  March (4)
    • ►  February (5)
    • ►  January (3)
  • ►  2019 (30)
    • ►  December (1)
    • ►  November (4)
    • ►  October (4)
    • ►  September (1)
    • ►  August (1)
    • ►  July (3)
    • ►  June (2)
    • ►  May (4)
    • ►  April (2)
    • ►  March (5)
    • ►  February (1)
    • ►  January (2)
  • ►  2018 (34)
    • ►  December (1)
    • ►  November (4)
    • ►  October (5)
    • ►  September (1)
    • ►  August (2)
    • ►  July (3)
    • ►  June (1)
    • ►  May (5)
    • ►  April (3)
    • ►  March (1)
    • ►  February (5)
    • ►  January (3)
  • ►  2017 (40)
    • ►  December (5)
    • ►  November (3)
    • ►  October (6)
    • ►  September (3)
    • ►  August (1)
    • ►  July (3)
    • ►  June (4)
    • ►  May (3)
    • ►  April (3)
    • ►  March (4)
    • ►  February (3)
    • ►  January (2)
  • ►  2016 (46)
    • ►  December (1)
    • ►  November (2)
    • ►  October (3)
    • ►  September (3)
    • ►  August (4)
    • ►  July (3)
    • ►  June (2)
    • ►  May (4)
    • ►  April (5)
    • ►  March (5)
    • ►  February (6)
    • ►  January (8)
  • ►  2015 (59)
    • ►  December (5)
    • ►  November (4)
    • ►  October (8)
    • ►  September (3)
    • ►  August (3)
    • ►  July (7)
    • ►  June (4)
    • ►  May (8)
    • ►  April (2)
    • ►  March (3)
    • ►  February (4)
    • ►  January (8)
  • ►  2014 (60)
    • ►  December (6)
    • ►  November (3)
    • ►  October (5)
    • ►  September (3)
    • ►  August (5)
    • ►  July (8)
    • ►  June (4)
    • ►  May (7)
    • ►  April (5)
    • ►  March (4)
    • ►  February (4)
    • ►  January (6)
  • ►  2013 (75)
    • ►  December (4)
    • ►  November (3)
    • ►  October (5)
    • ►  September (13)
    • ►  August (7)
    • ►  July (5)
    • ►  June (7)
    • ►  May (8)
    • ►  April (7)
    • ►  March (6)
    • ►  February (6)
    • ►  January (4)
  • ►  2012 (56)
    • ►  December (9)
    • ►  November (7)
    • ►  October (4)
    • ►  September (5)
    • ►  August (4)
    • ►  July (9)
    • ►  June (4)
    • ►  May (2)
    • ►  April (4)
    • ►  March (2)
    • ►  February (3)
    • ►  January (3)
  • ►  2011 (50)
    • ►  December (4)
    • ►  November (4)
    • ►  October (6)
    • ►  September (3)
    • ►  August (6)
    • ►  July (4)
    • ►  June (9)
    • ►  May (3)
    • ►  April (7)
    • ►  March (2)
    • ►  February (2)
  • ►  2010 (24)
    • ►  December (7)
    • ►  November (4)
    • ►  October (3)
    • ►  September (10)

Created with by ThemeXpose